我的 All In One 里面的 NAS 需求比较轻量,所以不选择安装完备的 NAS 系统(黑群晖、Unraid等),直接按需选择子应用以 Docker 形式部署在 PVE 下的 Debian LXC 容器内。
前置工作 - 用户权限
以下全文环境为 PVE 7.4
LXC 同样是容器技术,基于 Linux 的 namespace 和 cgroups。LXC 非特权容器通过 uidmap 将容器内的用户和宿主机的用户进行映射,提高了 LXC 的安全性。但对于我们文件共享来说,对权限管理造成了麻烦,但还是有方案来处理。
思路是 PVE 所有存储(包括 USB 外置设备)都使用同样的 uid/gid:1000:1000,然后容器内统一用 1000:1000 读写文件。
容器 uid(1000)/gid(1000) -> LXC idmap 映射 -> 宿主机 uid(1000)/gid(1000) -> 读写目录
- 修改子组 ID(允许映射 1000)
root@pve:~# cat /etc/subuid
root:100000:65536
root:1000:1
root@pve:~# cat /etc/subgid
root:100000:65536
root:1000:1
- 修改存储目录的权限
chown -R 1000:1000 /mnt/mydisk
扩展阅读
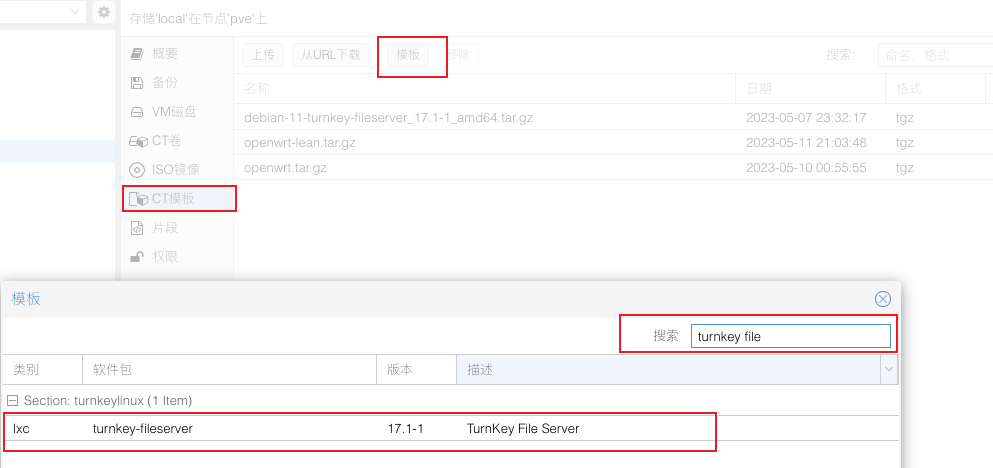
Turnkey File Server 文件服务器
搜索 fileserver 下载 CT 模板
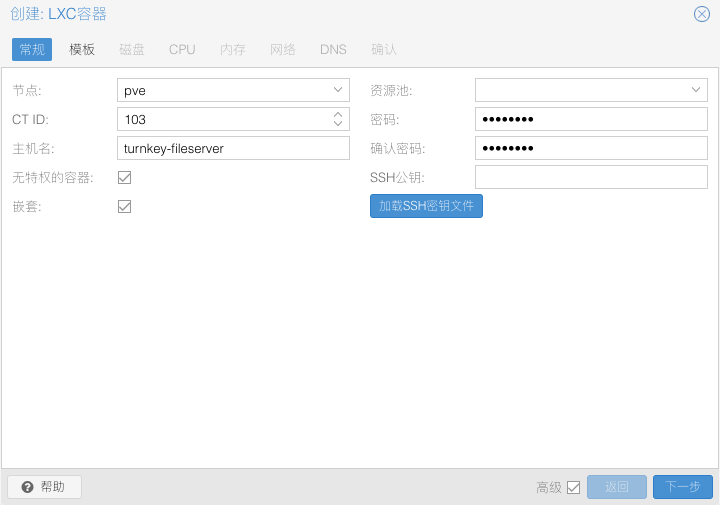
创建 LXC 创建容器
修改容器配置
# cat /etc/pve/lxc/101.conf
nameserver: 192.168.100.1
net0: name=eth0,bridge=vmbr0,firewall=1,gw=192.168.100.1,hwaddr=CA:53:82:1B:CE:CC,ip=192.168.100.5/25,type=veth
ostype: debian
rootfs: local:101/vm-101-disk-0.raw,size=2G
swap: 512
unprivileged: 1
# 挂载目录进入容器
mp0: /data,mp=/mnt/data,backup=0
mp1: /dev/sda1,mp=/mnt/disk,backup=0
# 增加 idmap 映射,指定 1000 映射成 1000,否则将按默认设置 从 100000 开始
lxc.idmap: u 0 100000 1000
lxc.idmap: u 1000 1000 1
lxc.idmap: u 1001 101001 64535
lxc.idmap: g 0 100000 1000
lxc.idmap: g 1000 1000 1
lxc.idmap: g 1001 101001 64535
启动容器安装
pct start 101
安装
打开PVE 对应容器的控制台,输入root/容器设定的密码 之后进入安装界面
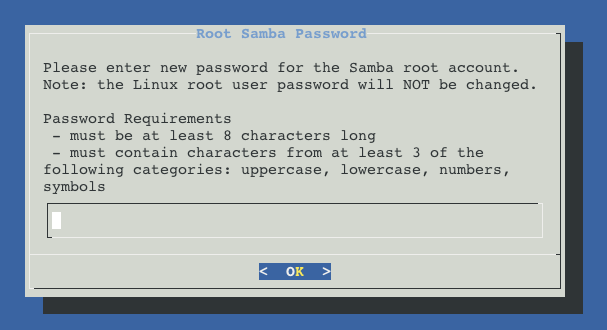
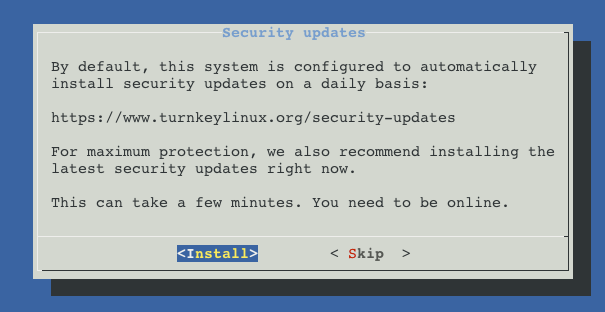
确认安装
TurnKey File Server 配置
打开 TurnKey File Server 设置页面,如 http://192.168.100.5,如入 _root/容器密码_进入 webmin。

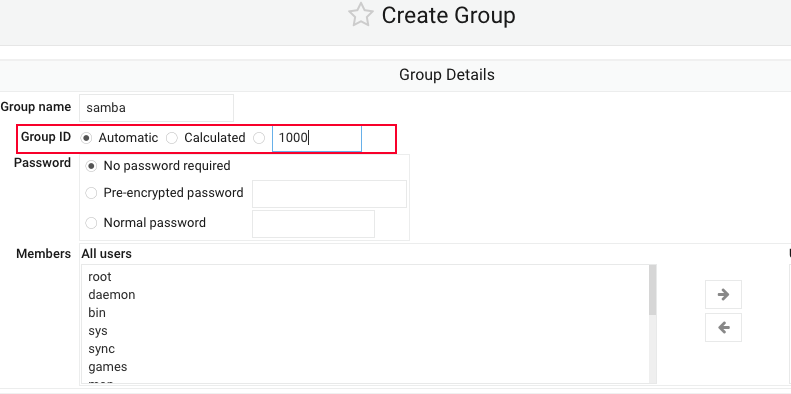
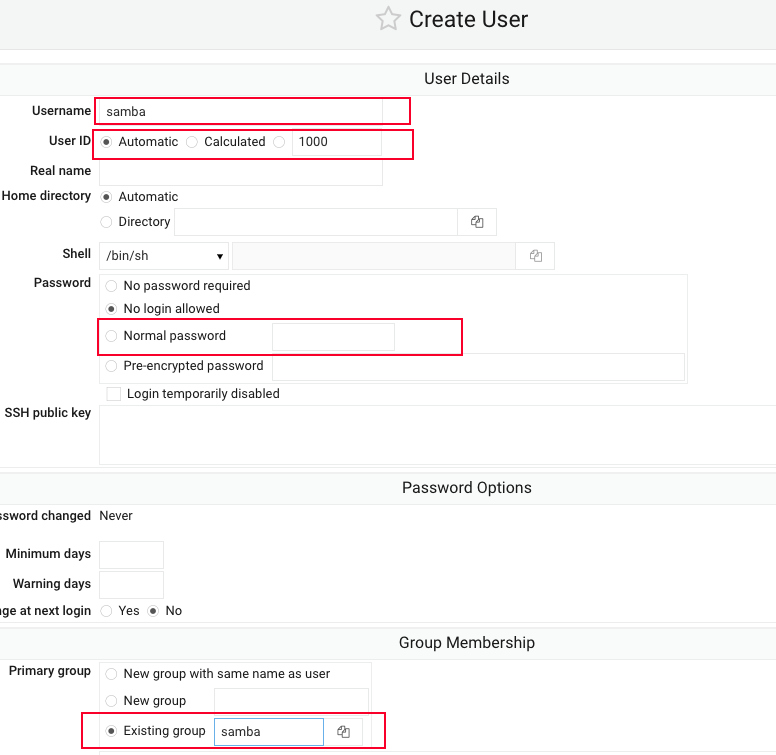
添加用户/组
进入 System - Users and Groups(也可以在命令行操作)
- 组名可以随意制定
- GID 指定为 1000
- 用户名可以随意制定
- UID 指定为 1000
- 选择用户组为 GID=1000 的
添加共享文件夹
进入 Servers - Samba Windows File Sharing - Create a new file share
- 设置用户为上面创建的 UID=1000 的用户
- 设置组为上面创建的 GID=1000 的组
- 权限设置为 755

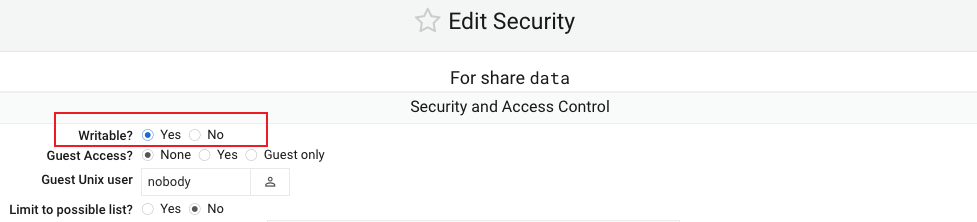
创建之后选择对应的共享文件夹,编辑安全策略,改成可写
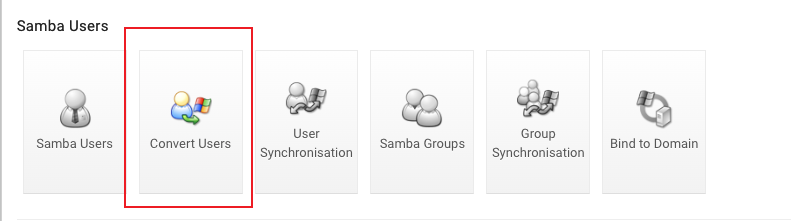
转换 Samba 用户
进入 Servers - Samba Windows File Sharing - Samba Users - Convert Users
- Only listed users or UID ranges:选择 UID=1000 的用户
- 点击重启 Samba Server 生效
确认配置生效
通过 Samba 连接到文件服务器,使用创建的用户和密码登录,创建一个文件。然后在 PVE 宿主机内查看权限:预期内是如下的 1000:1000
ls -lahn /mnt/mydisk
drwxr-xr-x   2 1000 1000 4.0K Jan  9  2023 tmp
为什么不使用 NFS? —— https://www.turnkeylinux.org/forum/support/20160225/nfs-unusable-fleserver-tempalte NFS 依赖于内核模块,LXC 容器共用宿主机内核,如果一定要运行 NFS 则需要宿主机安装对应软件和内核模块。
禁用 macOS 残留 dotfiles
macOS 默认会在访问目录生成存储扩展属性的 dotfile,在 macOS 中一般直接存储在文件系统中,但在网络访问(samba)中,macOS 同样也会生成此类文件在远程目录。
可以通过修改 samba 的配置将它们丢弃,进入 Servers - Samba Windows File Sharing - Samba Users - Edit Config File,在 Global 下添加配置
# Delete garbage Apple files
veto files = /._*/
delete veto files = yes
如果还想忽略 .DS_Store(文件夹布局等元信息)
veto files = /.DS_Store/._*/
用于运行 Docker 的 LXC 容器
Docker 可以运行在 PVE 的 VM 或者 LXC中,官方更推荐运行 Docker 在 VM 中,隔离性和安全性更好。甚至可以直接运行在 PVE 宿主机中,但就没有 VM 和 LXC 那么好迁移与备份。
配置 Debian LXC 容器
下载 debian 的 CT 模板,新建容器
修改容器配置文件增加挂载 vim /etc/pve/lxc/102.conf
# 开启嵌套虚拟化和按键
features: keyctl=1,nesting=1
我选择使用_特权容器_来作为运行 Docker 的宿主机。如果使用非特权容器,LXC 和 Docker 都会使用 Linux Namespace 技术,会有两次 user-remap,而且 Docker 的 user-remap 不能禁用,配置起来会比较麻烦。
启动容器
pct start 102
配置 locale 以及时区
dpkg-reconfigure locales
timedatectl set-timezone Asia/Shanghai
在 debian 容器内创建用户
root@docker:/# groupadd -g 1000 mygroup
root@docker:/# useradd -u 1000 -g 1000 myuser
安装 Docker
Install Docker Engine on Debian
Jellyfin 媒体服务器
为方便显卡直通,我使用的方案如下PVE => LXC Debian 容器 => Jellyfin Docker,以下以特权容器内运行为例,非特权容器可参照后文中附的链接。
安装驱动
在 Host 安装驱动
apt install vainfo
增加 i915 内核参数加载 GuC 和 HuC 固件
mkdir -p /etc/modprobe.d
sh -c "echo 'options i915 enable_guc=2' >> /etc/modprobe.d/i915.conf"
update-initramfs -u && sudo update-grub
重启后检查是否加载 GuC 和 HuC 固件
root@pve:~# dmesg | grep i915
[    3.929105] i915 0000:00:02.0: [drm] VT-d active for gfx access
[    3.929143] i915 0000:00:02.0: vgaarb: deactivate vga console
[    3.929215] i915 0000:00:02.0: [drm] Using Transparent Hugepages
[    3.932495] i915 0000:00:02.0: vgaarb: changed VGA decodes: olddecodes=io+mem,decodes=io+mem:owns=io+mem
[    3.933440] i915 0000:00:02.0: [drm] Finished loading DMC firmware i915/icl_dmc_ver1_09.bin (v1.9)
[    4.602140] i915 0000:00:02.0: [drm] [ENCODER:238:DDI A/PHY A] failed to retrieve link info, disabling eDP
[    4.748421] i915 0000:00:02.0: [drm] GuC firmware i915/ehl_guc_70.1.1.bin version 70.1.1
[    4.748429] i915 0000:00:02.0: [drm] HuC firmware i915/ehl_huc_9.0.0.bin version 9.0.0
确认核显驱动是否支持硬件加速
在 Host执行 如过有 not supported 或没有以下类似输出,则许考虑需要安装驱动或增加内核挂载。
root@pve:/ # dmesg | grep i915
[    3.714527] i915 0000:00:02.0: [drm] VT-d active for gfx access
[    3.714561] i915 0000:00:02.0: vgaarb: deactivate vga console
[    3.714626] i915 0000:00:02.0: [drm] Using Transparent Hugepages
[    3.715865] i915 0000:00:02.0: vgaarb: changed VGA decodes: olddecodes=io+mem,decodes=io+mem:owns=io+mem
[    3.716836] i915 0000:00:02.0: [drm] Finished loading DMC firmware i915/icl_dmc_ver1_09.bin (v1.9)
[    4.385706] i915 0000:00:02.0: [drm] [ENCODER:238:DDI A/PHY A] failed to retrieve link info, disabling eDP
[    4.527630] [drm] Initialized i915 1.6.0 20201103 for 0000:00:02.0 on minor 0
[    4.529784] snd_hda_intel 0000:00:1f.3: bound 0000:00:02.0 (ops i915_audio_component_bind_ops [i915])
[    4.530375] i915 0000:00:02.0: [drm] Cannot find any crtc or sizes
[    4.530875] i915 0000:00:02.0: [drm] Cannot find any crtc or sizes
部分需要安装可以参考 https://zhuanlan.zhihu.com/p/385401945
直通显卡
在 Host 查看显卡 ID
root@pve:/data# ls -l /dev/dri/
total 0
drwxr-xr-x 2 root root         80 May 13 22:41 by-path
crw-rw---- 1 root video  226,   0 May 13 22:41 card0
crw-rw---- 1 root render 226, 128 May 13 22:41 renderD128
编辑 LXC 配置,配置映射显卡
lxc.cgroup2.devices.allow: c 226:0 rwm
lxc.cgroup2.devices.allow: c 226:128 rwm
lxc.mount.entry: /dev/dri/card0 dev/dri/card0 none bind,optional,create=file
lxc.mount.entry: /dev/dri/renderD128 dev/dri/renderD128 none bind,optional,create=file
启动 & 配置 Docker 容器
这里使用 nyanmisaka 大佬封装的 jellyfin docker,更好的支持硬解码。
查看 Host 机中 video 和 render 组的 GID(LXC 非特权容器还需修改 LXC 配置):
cat /etc/group | grep video
cat /etc/group | grep render
Note:Jellyfin 需要使用显卡设备,需要注意 Jellyfin 容器启动用户是否有使用显卡设备(
/dev/dri/xxx)的权限。--group-add参数用于指定在容器内运行的进程所需的其他组,以便容器中的进程可以从操作系统检索附加的用户组。
docker run -d --name=jellyfin \
 --user 1000:1000 \
 -e TZ=Asia/Shanghai \
 -p 8096:8096 \
 -v /root/jellyfin/config:/config \
 -v /mnt/data:/mnt/data \
 -v /mnt/disk:/mnt/disk \
 --device /dev/dri:/dev/dri \
 --group-add="103" \
 --group-add="44" \
 --restart unless-stopped \
 nyanmisaka/jellyfin:latest
启动 Jellyfin 后进入控制台 - 播放,开启硬件加速(11代 Intel CPU 必须开启低电压解码选项)。
验证
在 Jellyfin 容器中执行测试命令确认驱动加载无误
docker exec -it jellyfin /usr/lib/jellyfin-ffmpeg/vainfo
docker exec -it jellyfin /usr/lib/jellyfin-ffmpeg/ffmpeg -v verbose -init_hw_device vaapi=va -init_hw_device opencl@va
最后使用 Jellyfin 播放视频,选择更低质量的分辨率确认是否使用转码播放。也可以安装 intel-gpu-tools 来查看 GPU 负载:

参考
- Jellyfin 官方文档Hardware Acceleration
- 更多 Jellyfin 配置,如中文字体的配置 https://www.alainlam.cn/?p=255
- How to setup VA-API within Proxmox LXC Unprivileged container
- Running Jellyfin on LXC unprivileged (promox) with Transcoding (iGPU)
Aria2 下载服务器
在上述 debian LXC 容器的基础上,可参照 https://p3terx.com/archives/docker-aria2-pro.html 使用 1000:1000 的用户启动即可。如
docker run -d \
 --name aria2 \
 --restart unless-stopped \
 --log-opt max-size=1m \
 --network host \
 -e PUID=1000 \
 -e PGID=1000 \
 -e RPC_SECRET=<password> \
 -e RPC_PORT=6800 \
 -e LISTEN_PORT=6888 \
 -v /mnt/data/aria2-config:/config \
 -v /mnt/data/downloads:/downloads\
 p3terx/aria2-pro
NAStool 资源归集整理服务
NAStool 3.x 之后移除了 BT 的支持,并且很多功能都需要 PT 站点认证,这对于轻量玩家比较不友好,我在找到合适的替代之前暂时先用 2.9 版本替代。
成人资源可以使用 Movie_Data_Capture or metatube
Alist
https://alist.nn.ci/zh/guide/install/docker.html
Bitwarden 密码管理
同上,为了避免 all in boom 之后无法输入密码,部署在云服务器上同时每日备份至 Dropbox。
青龙面板
docker run -d \
  --name qinglong \
  --hostname qinglong \
  -v /mnt/data/docker/qinglong:/ql/data \
  -p 5700:5700 \
  --restart unless-stopped \
  docker.io/whyour/qinglong:latest