Docker Clash
在适当目录新建 clash-config 文件夹,然后在里面新建 config.yaml,如果是订阅链接则直接下载链接命名为 config.yaml 即可。
以下例子 Docker 容器启动直接使用 Host 模式,您也可以选择只将有用端口暴露到宿主机。
docker run -d \
--name clash \
--restart unless-stopped \
--log-opt max-size=1m \
--network host \
-v $(pwd)/clash-config:/root/.config/clash \
dreamacro/clash
Web UI
如果系统已经有 Nginx,则直接下载 https://github.com/haishanh/yacd/archive/gh-pages.zip 到 Nginx 的 www 目录解压即可,另外也可以使用 Docker 镜像启动:
docker run -p 1234:80 -d --rm haishanh/yacd
打开 WebUI 地址,填入 clash 的 API 地址(即 IP + config.yaml 中 external-controller端口号 )和 Secret 即可。
代理
MacOS
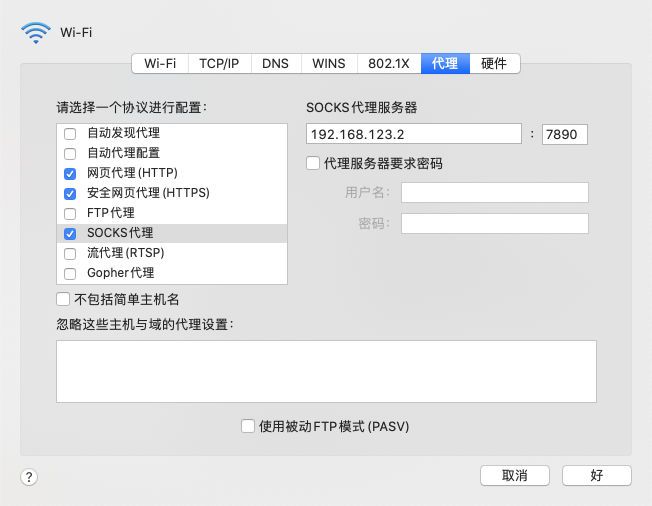
MacOS 配置代理的方式在「设置」-「网络」-「选择网络如Wi-FI」-「高级」-「代理」,将 HTTP、HTTPS、SOCKS 都配置为 IP + 配置的mixed-port(clash 目前可配置 mixed-port 同时支持 HTTP(S) 和 SOCKS)。
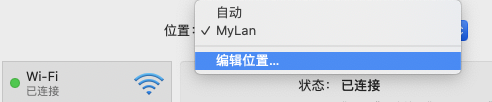
一般情况下,代理服务器都是固定的局域网内的一台机器,如果是 MacBook 到了其他环境就无法使用代理了,此时取消配置代理。所以需要一个方法自动地根据网络环境,开关代理。可以在「网络」配置下新建一个位置,然后将代理配置到新位置的目标连接内,如「Wi-Fi」:
终端代理
局域网其他机器(需要将下面的 localhost 改为代理服务器 IP )或者代理服务器本身终端使用的话,需要配置在 bashrc 或 zshrc 内:
# Define `setproxy` command to enable proxy configuration
setproxy() {
  export http_proxy="http://localhost:7890"
  export https_proxy="http://localhost:7890"
  export all_proxy="socks5://localhost:7890"
  echo "Proxy on"
}

# Define `unsetproxy` command to disable proxy configuration
unsetproxy() {
  unset http_proxy
  unset https_proxy
  unset all_proxy
  echo "Proxy off"
}
然后在终端内使用 setproxy 开启代理,unsetproxy 关闭代理。
透明代理
如果局域网内有很多这样的设备去配置代理,是一件十分麻烦的事情,那么此时可能透明代理方式可能更适用。
1. 转发
为了让系统有基本的路由转发功能,需要开一下 IP 转发。编辑 /etc/sysctl.conf 文件,将
net.ipv4.ip_forward 和 net.ipv6.conf.all.forwarding 都改为 1,然后执行 sysctl -p 使配置生效。
cat /proc/sys/net/ipv4/ip_forward # 检查是否已生效
2. DNS
Ubuntu 以及其他的一些 Linux 发行版 默认使用了 systemd-resolved 提供域名解析服务,默认会占用服务器的53端口。由于我们需要使用 clash 提供的 DNS 服务,则需要禁止 system-resolved 监听端口或者直接将其停止。
# 停止服务
sudo systemctl stop systemd-resolved && systemctl disable systemd-resolved
# 或者取消监听端口(二者选其一)
vi /etc/systemd/resolved.conf
# 将 DNSStubListener 改为 no
然后 sudo systemctl restart systemd-resolved
3. iptables
首先 clash 需要配置 tproxy-port ,以下为例子:
参照 clash-udp-tproxy-support: https://lancellc.gitbook.io/clash/start-clash/clash-udp-tproxy-support
以下例子,7893为 tproxy port,5353 为 clash dns port
# Port of HTTP(S) proxy server on the local end
port: 7890

# Port of SOCKS5 proxy server on the local end
socks-port: 7891

# Transparent proxy server port for Linux and macOS (Redirect TCP and TProxy UDP)
# redir-port: 7892

# Transparent proxy server port for Linux (TProxy TCP and TProxy UDP)
# tproxy-port: 7893

# HTTP(S) and SOCKS4(A)/SOCKS5 server on the same port
# mixed-port: 7890
原本需要使用到 redir port,从 v1.3.0 开始 Clash 支持了单独配置的 tproxy port。
# IP rules
ip rule add fwmark 1 table 100
ip route add local default dev lo table 100

# Bypass private IP address ranges
iptables -t mangle -N CLASH
iptables -t mangle -A CLASH -d 0.0.0.0/8 -j RETURN
iptables -t mangle -A CLASH -d 10.0.0.0/8 -j RETURN
iptables -t mangle -A CLASH -d 127.0.0.0/8 -j RETURN
iptables -t mangle -A CLASH -d 169.254.0.0/16 -j RETURN
iptables -t mangle -A CLASH -d 172.16.0.0/12 -j RETURN
iptables -t mangle -A CLASH -d 192.168.0.0/16 -j RETURN
iptables -t mangle -A CLASH -d 224.0.0.0/4 -j RETURN
iptables -t mangle -A CLASH -d 240.0.0.0/4 -j RETURN

# Redirect
iptables -t mangle -A CLASH -p udp -j TPROXY --on-port 7893 --tproxy-mark 1
iptables -t mangle -A CLASH -p tcp -j TPROXY --on-port 7893 --tproxy-mark 1
iptables -t mangle -A PREROUTING ! -i docker0 -j CLASH

# DNS, Redirect 53 to 5353
iptables -t nat -I PREROUTING -p udp --dport 53 -d 192.168.0.0/16 -j REDIRECT --to 5353
将上面保存为 set-iptables.sh 文件执行。
持久化
由于 iptables 规则会在重新启动后清空,因此需要 iptables-persistent 实现持久化:
sudo apt install iptables-persistent netfilter-persistent
netfilter-persistent save
netfilter-persistent start
iptables-save  > /etc/iptables/rules.v4
保存后 iptables 规则会在重新启动后自动加载,也可以使用netfilter-persistent reload 命令手动加载到 iptables。
IP 规则添加在 /etc/network/interfaces,https://unix.stackexchange.com/questions/84552/set-persistent-routing-table-on-debian
        post-up ip rule add fwmark 1 table 100
        post-up ip route add local default dev lo table 100
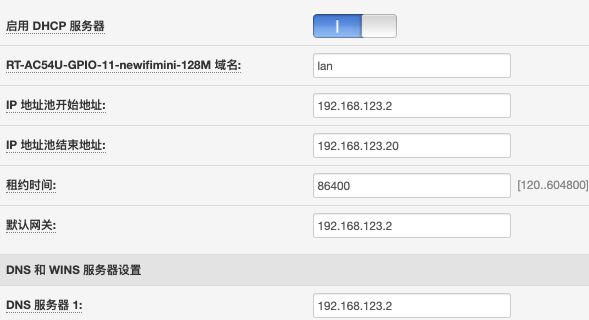
4. 路由配置网关和DNS
在上级路由 DHCP 配置网关和 DNS 均为代理服务器的 IP 即可。
至此,局域网内的所有设备都可以愉快的无障碍上网了。